
Security in web development is of utmost importance, particularly when dealing with user authentication. JSON Web Tokens (JWT) have become an increasingly popular method for implementing authentication mechanisms in Node.js applications as they offer stateless, secure, and scalable solutions for verifying users and providing access to protected resources. In this tutorial we will demonstrate how JWT authentication can be implemented within Node.js applications using middleware.
What is JWT?
JWT stands for JSON Web Token and is an open standard (RFC 7519) that defines an efficient method of communicating data using JSON objects between parties. It consists of three parts: header, payload and signature. The header contains information such as the signing algorithm used while payload contains any claims about users or data to which JWT applies; finally signature is produced using encoded header, payload and secret key signature generation in order to guarantee its integrity.
How does JWT Authentication work?
JWT authentication requires three major steps: authentication, token generation, and token verification.
- Authentication:
When users attempt to log into an application, they provide their credentials (such as their username and password). If these credentials are valid, the server verifies them before creating a JWT for that user; additionally it may include additional user data in its payload such as ID or role information. - Token Generation:
Once a user is authenticated, the server generates a JWT with a secret key known only to itself and signs it using one of several popular signing algorithms such as HMAC or RSA. Typically, its payload contains ID information about that user or relevant data about them. The token’s signature can then be verified using Base64-encoding of its header, payload and secret key as part of an encryption scheme (such as, HMAC, RSA). - Token Verification:
For subsequent requests that require authentication, the client sends the JWT as part of the request header. When received by the server, this token is verified using its stored secret key to recalculate its signature and compare it with that found within it. If they match, this signals to them that they can trust what information lies within this token and grant access to any requested resource.
Implementing JWT Authentication in Node.js:
To implement JWT authentication in a Node.js application, you’ll need to follow these steps:
- Set up a Node.js project and install the necessary dependencies, such as
jsonwebtokenandexpress. - Create a user authentication system that verifies the user’s credentials and generates a JWT upon successful authentication.
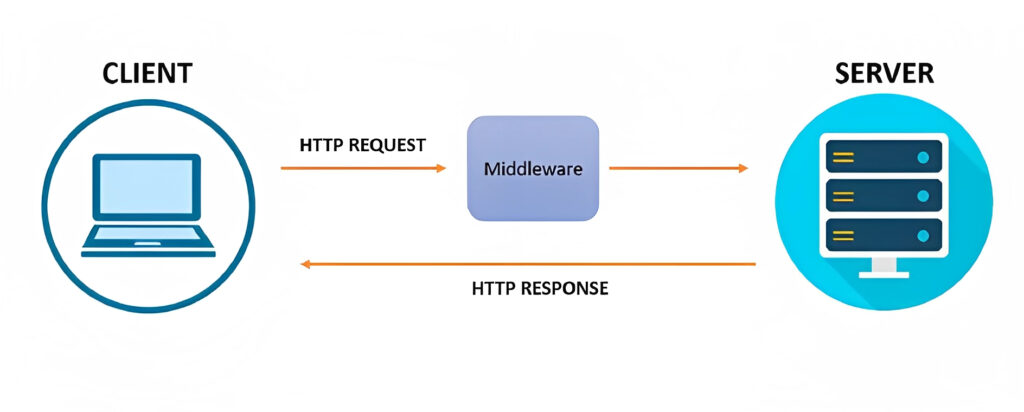
- Implement middleware that intercepts incoming requests and verifies the authenticity of the JWT.
- Protect the routes or resources that require authentication by adding the JWT verification middleware to those routes.
- Handle authentication errors and unauthorized access by returning appropriate responses to the client.
Step 1: Launch a New Node.js Project
In the terminal, use this command to initiate a Node.js project and create a brand new directory:
mkdir jwt-authentication
cd jwt-authentication
npm init -y
Step 2: Install necessary packages
Install the necessary packages for JWT authentication:
npm install express jsonwebtoken bcrypt dotenvexpress: Development for Node.js is made more efficient with Express, an effective web framework.jsonwebtoken: To create and verify JSON Web Tokens, jsonwebtoken was crafted by developers who understand its importance.bcrypt: An application known as bcrypt was created to compare and securely hash passwords.dotenv: Programmers can benefit from dotenv, a library for managing environment variables. Its goal is to assist with controlling the variables.
Step 3: Establish an Express server
Create a new file named server.js and set up a basic Express server with some routes:
// server.js
const express = require('express');
const app = express();
const PORT = process.env.PORT || 3000;

// Home route
app.get('/', (req, res) => {
  res.send('Welcome to the JWT authentication example!');
});

// Start the server
app.listen(PORT, () => {
  console.log(`Server is running on port ${PORT}`);
});
Step 4: Develop a User Model and Database
We will employ an in-memory array to store user data for this example. To do this, create a file named user.model.js within the project directory that enumerates both classes and arrays associated with user modeling classes and arrays.
// user.model.js

class User {
  constructor(id, username, password) {
    this.id = id;
    this.username = username;
    this.password = password;
  }
}

const users = [new User(1, 'john', 'password')];

module.exports = {
  User,
  users
};
Step 5: Add Registration and Login Routes in userController.js file
Create a user.controller.js file in your project directory.
// user.controller.js

const bcrypt = require('bcrypt');
const jwt = require('jsonwebtoken');
const { User, users } = require('./user.model');

// Function to handle user registration
function registerUser(req, res) {
  const { username, password } = req.body;

  // Check if the username is already taken
  if (users.some(user => user.username === username)) {
    return res.status(400).json({ message: 'Username already taken' });
  }

  const id = users.length + 1;
  const newUser = new User(id, username, password);

  // Hash the password using bcrypt
  bcrypt.hash(newUser.password, 10, (err, hash) => {
    if (err) {
      return res.status(500).json({ message: 'Error hashing password' });
    }

    newUser.password = hash;

    // Add the new user to the users array
    users.push(newUser);

    res.status(201).json({ message: 'User registered successfully' });
  });
}

// Function to handle user login
function loginUser(req, res) {
  const { username, password } = req.body;

  // Find the user with the provided username
  const user = users.find(user => user.username === username);

  // If the user doesn't exist, return an error
  if (!user) {
    return res.status(401).json({ message: 'Invalid username or password' });
  }

  // Compare the provided password with the stored hashed password
  bcrypt.compare(password, user.password, (err, result) => {
    if (err || !result) {
      return res.status(401).json({ message: 'Invalid username or password' });
    }

    // Generate a JWT token with user information
    const token = jwt.sign({ id: user.id, username: user.username }, 'secret');

    // Return the token to the client
    res.json({ token });
  });
}

module.exports = {
  registerUser,
  loginUser
};
Step 6: Implementing JWT Authentication Middleware
JWT tokens enable you to securely and validate routes by creating a middleware function. Here is an example to get you started.
Create the middleware/authenticate.js file by creating a folder of that name in the website root.
// middleware/authenticate.js

const jwt = require('jsonwebtoken');
const dotenv = require('dotenv');

dotenv.config();

const authenticate = (req, res, next) => {
  const token = req.header('Authorization');

  if (!token) {
    return res.status(401).json({ message: 'Authorization token is required.' });
  }

  try {
    const decoded = jwt.verify(token, process.env.JWT_SECRET);
    req.user = decoded.user;
    next();
  } catch (err) {
    return res.status(401).json({ message: 'Invalid token.' });
  }
};

module.exports = authenticate;
In this middleware, we first import the necessary packages: jsonwebtoken for token verification and dotenv to load environment variables. We then define the authenticate function that will be used as middleware in our routes.
Inside of the authenticate function, we retrieve a token from the request’s Authorization header. If no token can be found, we return a 401 Unauthorized response. if present however, we use jwt.verify method and the JWT_SECRET environment variables to attempt verification before extracting user details from decoded tokens and assigning them to req.user for future use. For later use before calling next() for passing control over to middleware or route handlers.
Step 7: Update server.js
server.js// server.js
const express = require('express');
const app = express();
const { registerUser, loginUser } = require('./user.controller');
const authenticate = require('./middleware/authenticate');
const PORT = process.env.PORT || 3000;
app.use(express.json());
// Home route
app.get('/', (req, res) => {
res.send('Welcome to the JWT authentication example!');
});
// Example route with authentication middleware
app.get('/protected', authenticate, (req, res) => {
res.json({ message: 'Protected route accessed successfully.' });
});
// User registration route
app.post('/register', registerUser);
// User login route
app.post('/login', loginUser);
// Error handling middleware
app.use((err, req, res, next) => {
console.error(err);
res.status(500).json({ error: 'Internal server error' });
});
app.listen(PORT, () => {
console.log(`Server is running on port ${PORT}`);
});We’ve imported the authentication middleware (authenticate) from middleware/authenticate.js file and added it as middleware for /protected route. This means that the /protected route will only be accessible if requests contains valid JWT token in the Authorization header.
Step 8: Validate implementation
- Start the server:
$ node index.js- With Postman or cURL, make a GET request to
http://localhost:3000/protectedwithout specifying an authorization token in theAuthorizationheader and you should receive a 401 Unauthorized response with the message “Authorization token is required.” - Gather a JWT token (e.g. through user registration or login) and add it as part of the Authorization header of your request, for example:
Authorization: Bearer <your_token>Replace <your_token> with your actual token value. If the token is valid, you should receive a 200 OK response with the message “Protected route accessed successfully.”
You can test the API using a tool like Postman or cURL:
- Register a new user: Send a POST request to
http://localhost:3000/registerwith a JSON body containing theusernameandpassword. - Login: Send a POST request to
http://localhost:3000/loginwith the same JSON body as the registration. - Get the protected route: Send a GET request to
http://localhost:3000/protectedwith theAuthorizationheader set toBearer <token>.
Remember to replace <token> with the actual token received during the login process.
That’s it! You have implemented JWT authentication in Node.js using Express and the jsonwebtoken and bcrypt libraries.
Concluding the JWT Authentication
JWT authentication offers a reliable and cost-effective means of authenticating Node.js applications. By using middleware, we can easily protect routes requiring authentication. To demonstrate JWT implementation in Node.js applications using middleware, we created a basic Express server, created a function to handle JWT authentication, applied the middleware to protected routes, and applied JWT token generation during registration or login while protecting its secret key safely. By taking these steps, you can securely add authentication using JWT tokens into Node.js applications using middleware implementation using middleware; in practice these steps allow easy protection of routes requiring authentication – much faster and simpler than doing it on its own! You may also look into extending your application by building API’s. Here’s a comparison of REST and GraphQL, which might be of interest.
Leave a Reply